

How do I achieve the most precise and smooth shifting with my EDS TX groupset?
Getting competition-grade shifting out of the EDS TX takes more than a quick app pairing. Follow this step-by-step setup protocol to make sure your system runs flawlessly across every gear.
Phase 1: Before You Start — Three Golden Rules
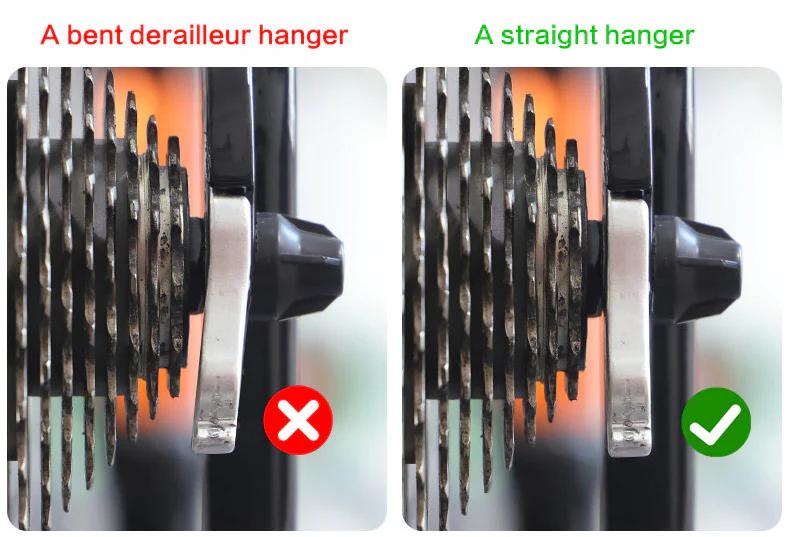
1. Derailleur Hanger Alignment
This is the single most important step. Even a slightly bent hanger will prevent the system from shifting with 100% consistency. Use a proper alignment tool or take the bike to your local shop before doing anything else.
2. Keep Your Drivetrain Consistent
For the best results, avoid mixing cassettes and chains from different brands. Matching components means the cassette ramp profiles and chain plates work exactly as intended — and shifting feels it.
3. Waxed Chain? Check for Stiff Links
If you run a waxed chain, make sure there are no stiff links and wipe off any excess wax from the outer plates. Built-up wax can stop the chain from dropping cleanly onto smaller cogs.
Phase 2: Step-by-Step Tuning Protocol
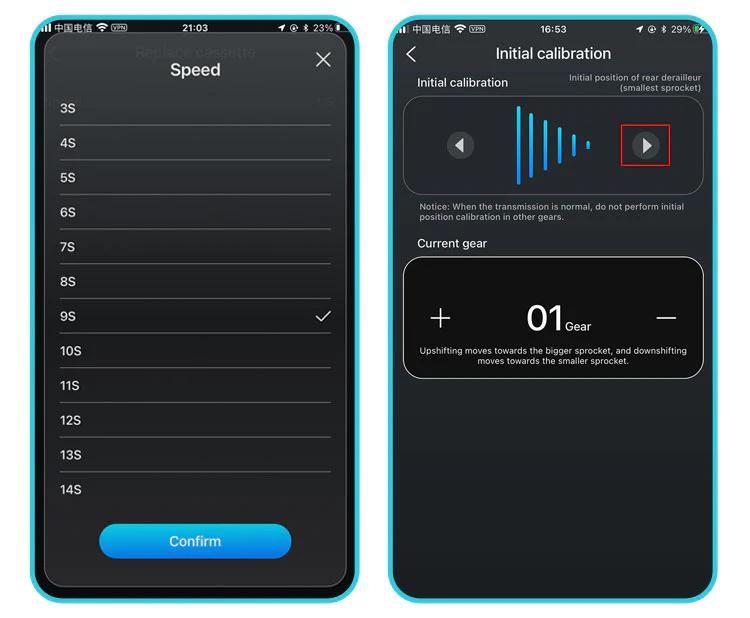
Step 1 — Initial Positioning (Smallest Cog)
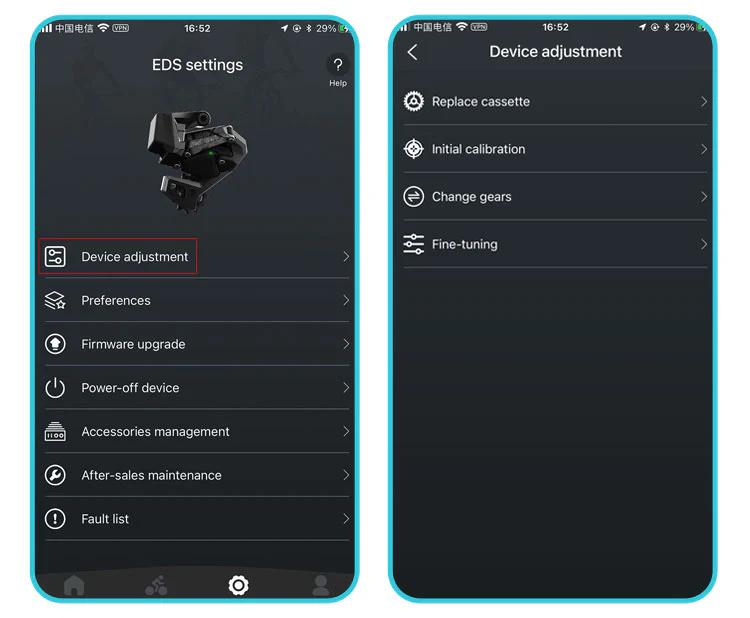
- Select your cassette size in the Wheeltop App.
- Shift the chain to the smallest cog and the largest chainring
- Important: Back the mechanical limit screws out completely — don't use them to set position yet. Let the motor do the work at this stage.
- Use the app's micro-adjustment arrows to align the top jockey wheel directly under the smallest cog until the chain runs completely silent.
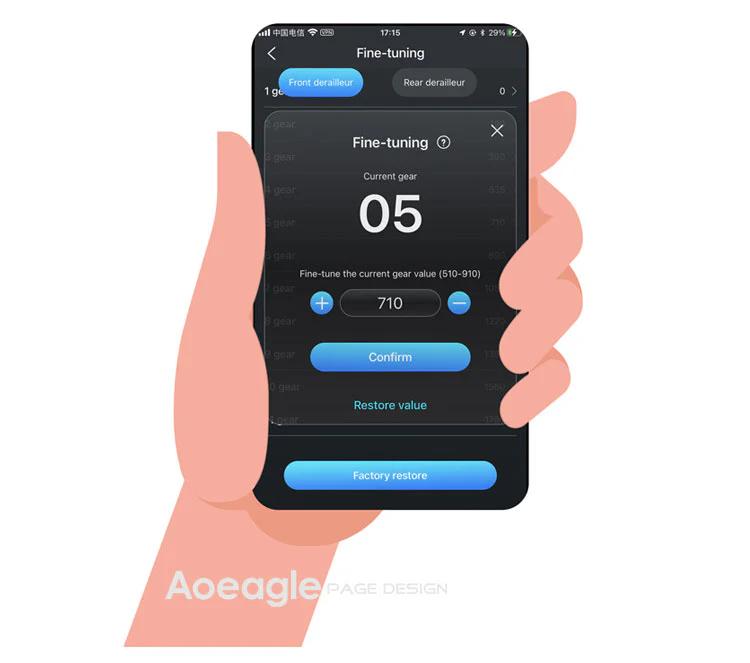
Step 2 — Fine-Tuning Across the Cassette (The 10-Unit Rule)
- Open the Fine Tuning section in the app.
- Shift up one cog at a time. If a shift feels rough or noisy, adjust in increments of 10 units.
Pro TipA new setting doesn't register until you shift back down to the previous cog, then back up to the one you adjusted. Work through the entire cassette this way for a fully "mapped" drivetrain.
Step 3 — B-Gap (Tension Screw) Adjustment
Skip the guesswork of a specific measurement. Instead, dial the B-screw until the jockey wheel is as close to the cassette as possible without any rumble or interference during shifts. Do this check in the smallest chainring, where chain angle is at its most extreme.
Step 4 — Front Derailleur (FD) Calibration
- Use Initial Calibration only for the FD — avoid Fine Tuning unless you have a specific reason.
- With the chain on the smallest cog / large chainring, adjust the FD outward until there's no chain rub — but make sure it doesn't touch the crank arm while pedaling.
Auto-TrimThe EDS TX automatically micro-adjusts the front derailleur as you shift through the rear cassette to prevent chain rub. Some light rub in extreme cross-chain positions (large/large or small/small) is normal — and those combinations are best avoided on the trail anyway.
Step 5 — Mechanical Limit Screws (Safety Backup)
- Only adjust the limit screws after the electronic setup is fully dialed in.
- Thread each screw in until it just makes contact with the derailleur body, then back it off 1/8 to 1/4 turn. This keeps the screw acting as a mechanical stop without interfering with the motor's travel range.
Still getting front derailleur rub? Try slightly loosening the FD mounting bolt, physically rotating the cage by a degree or two, then retightening. A small real-world angle adjustment often solves what software tweaks can't.